This page provides some basic instructions for getting around and doing things with in Second Life. It is by no means exhaustive, and should be supplemented by Second Life's own PDF "Quickstart Guide" if you want more functionality, but what appears below will provide you with the basics to necessary to not seem like an utterly pathetic noob.
**Important Note for Mac Users**
A great deal of your interaction with your environment within Second Life will involve "right-clicking" your mouse. Some older Macs use a one-button mouse; others may need to have their mice (mouses?) reconfigured to enable right-clicking. This is simple to do, and Apple itself provides instructions here on reconfiguration, or using "right-click" with only one mouse button:
http://www.macinstruct.com/node/66
Moving Your Avatar
Moving your avatar in Second Life, whether you are walking, flying (yes, you can fly in Second Life!), or operating a vehicle, almost invariably involves using the "arrow keys" on your keyboard. (There is an on-screen control available, but this is awkward and silly: you are well-advised to simpy close it.) The "up" key will move you forward, the "down" key will move you backward, and the "left" and "right" keys will turn your avatar.
It's as simple as that!
Flying and Landing
 To fly in Second Life, you can do one of two things.
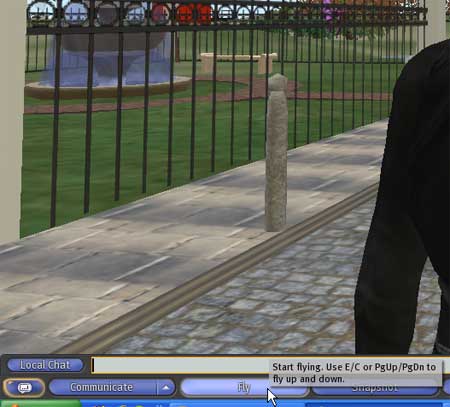
1) Click the "Fly" button at the bottom left of your screen.
2) Press the "Home" button on your keyboard.
To move once in the air, use the "arrow" keys, as noted above. To fly higher, press the "Page Up" button; to lose altitude, press the "Page Down" key.
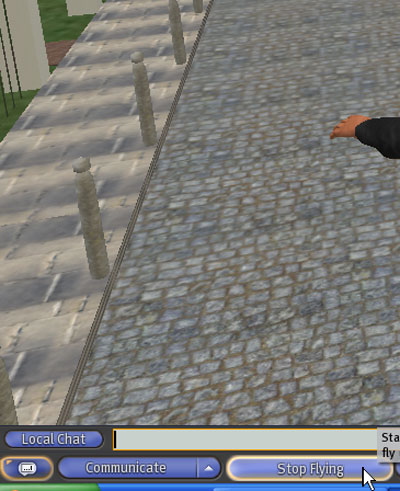 To land (i.e., stop flying), you can click the same button at the bottom left that got you up in the first place (this button will now read "Stop Flying"), or press the "Page Down" key on your keyboard until you hit the ground (hopefully not too hard).
Chat and Communication
There are four basic forms of communication in Second Life.
- Public "Chat" -- This is text chat, and works essentially the same way as communication in an online "chat room." To "hear" public chat, you must be within "range" of the avatar(s) speaking, which is usually about 20 metres.
- Instant Messaging (IM) -- This closely resembles public Chat, but with some differences. IMs usually occur only between two people; you also need not be in "range" of each other (i.e., you can IM someone anywhere within SL, regardless of your own location). Most importantly, however, IMs are private: they cannot be "overheard" by anyone else. There are also "group" IMs, which communicate via IM to everyone in-world who belongs to a particular group.
- Voice -- You can use a microphone and headset in Second Life to speak directly to people within "chat range"; it is also sometimes employed in "private" mode, where it functions as a form of aural IM. People within Second Life are sharply divided over the use of voice: while many use it regularly (including those whom disabilities may prevent from typing), others despise it. Some sims within Second Life have voice "disabled," meaning that it cannot be used there. I will be employing voice from time to time in class, but I would ask you NOT to use it during class time.
- Group Notices -- These are notices or announcements sent out to everyone with a group; they appear within blue boxes at the top right of your screen, and may sometimes include attachments that you can save to your inventory. I will be making use of these on occasion.
Using chat in Second Life is supremely easy.
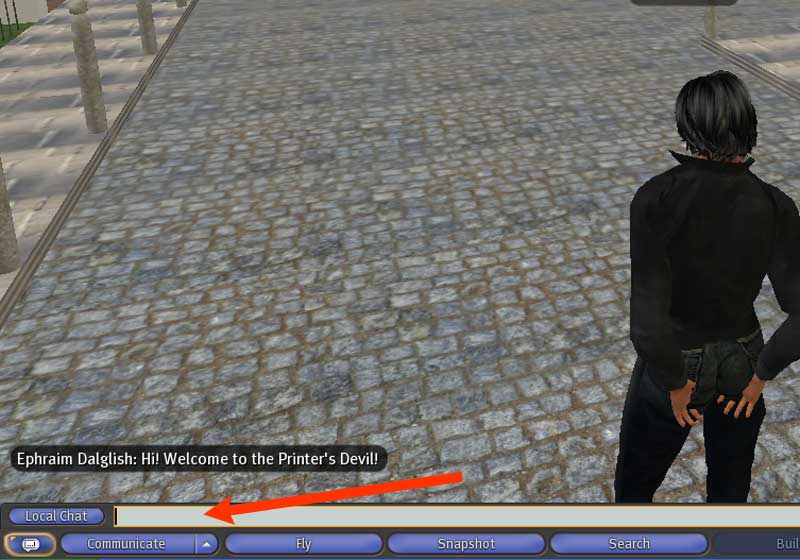
Simply type in the text that you wish to send into this text field, and hit your "Return" or "Enter" key.
You can also keep running chat going in a "Local Chat" text box; this is often more convenient, especially if there is a lot of chat going on that is disappearing off your screen faster than you can read it.
Simply click the "Local Chat" button that appears next to the Chat text field, and a smallish window that records all chat will appear on your screen. This window has its own text field into which you can enter your own chat.

The IM text box looks very similar to this (which can sometimes result in embarrassing confusion: make sure that you don't type something intended for a private IM into public chat, where everyone can hear it!).
 If you recieve an IM while your IM text box is closed, a blue button stating "IM received" will appear just above the "Local Chat" button. Clicking this will open the IM text window.
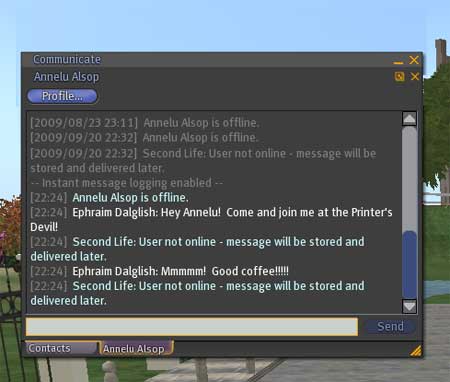
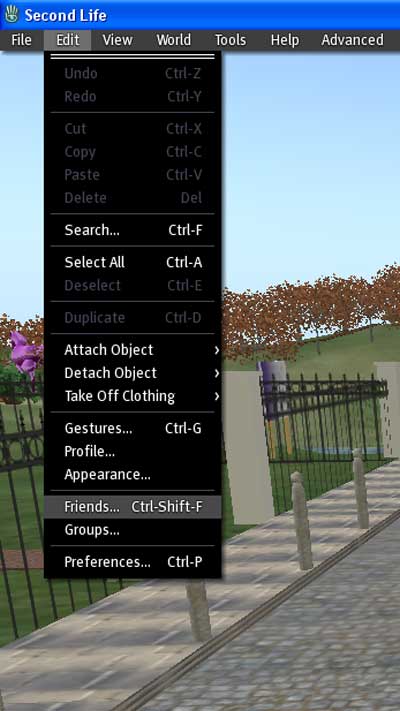 To IM someone, you can (if they are within sight) right click on his or her avatar, and choose "Send IM." Alternately, you can open your "Contacts" window, through the "Edit" item on the top left of the screen menu, choosing "Friends." You can also use the "Contacts" tab in your IM window, as shown in the pictures above and below.
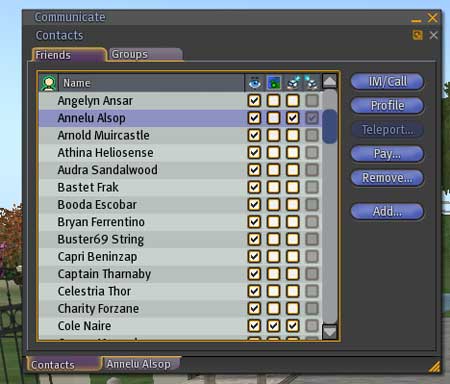
From within your contacts window, click on "IM/Call." This will open a new IM window for you to use to IM with that person. ("Call" means using voice to speak to that person privately.)
Sitting and Standing
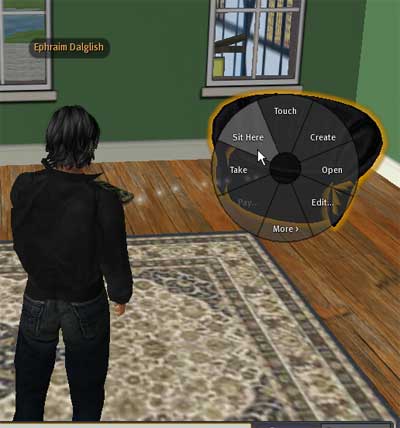 Sitting on chairs, objects, or the ground in Second Life involves the use of the right button on your mouse. Generally, one right clicks on the object upon which you want to sit, and choose the "Sit here" option from the pie menu that should appear.
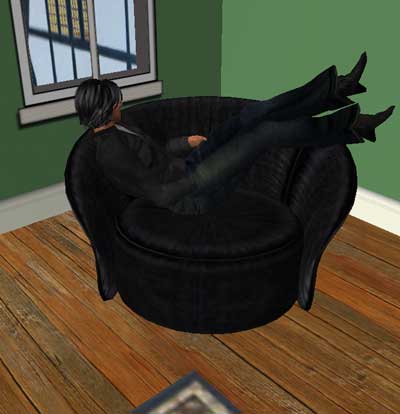 Some objects contain animations that make your avatar sit in a certain way; commercially produced chairs, couches, and pillows, for example, may include these. Some objects (such as the chairs in the student lounge) include multiple "sit" poses that you can change, generally by right-clicking the chair, and choosing "Touch" from the pie menu. A blue drop down menu will appear at the top right of the screen, from which you may choose any option.
But please keep your feet off the furniture.
To stand again, simply click the blue "Stand up" button that will appear centred at the bottom of your screen.
Using Pose Balls
 Many actions in Second Life involve the use of so-called "Pose Balls." These are various coloured balls that contain animations that will move or position your avatar in predetermined ways. Conventionally, pose balls for "boys" are coloured blue, and for women, coloured (yes, you guessed it . . .) pink, but most poses are actually unisex.
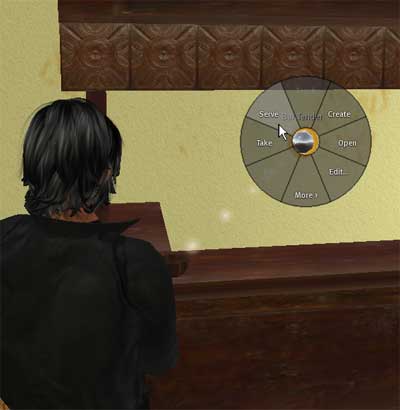
You will find one such pose ball behind the coffee bar in the coffee shop at The Printer's Devil: it is coloured silver and is (appropriately) labelled "Bar Tender."
Right click on this ball. At approximately 10:00 on the pie menu that will appear, you will see the option "Serve." Sometimes, this field will simply say "Sit" or "Sit here," as in the case of the chair above.
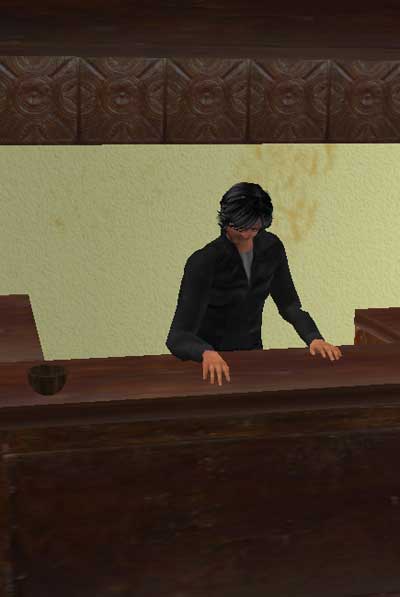 Choose this option, and your avatar will be moved "onto" the pose ball, and will be given a particular position or animation that it will automatically perform.
Sometimes click on a pose ball will prompt a blue menu box, asking your permission to animate your avatar, or providing you with a menu of possible poses or actions.
To get off a pose ball again, simply click the "Stand up" button the bottom centre of your screen, as you would standing up from a chair.
Dance balls often work this way. Couples dances will usually feature two balls, generally pink and blue. Both balls need to be occupied to make the animation work correctly.
Interacting with Scripted Objects
 Most objects in Second Life are essentially inert: they look pretty, but don't actually "do" anything. Other objects however are "scripted," and perform particular tasks when you activate them.
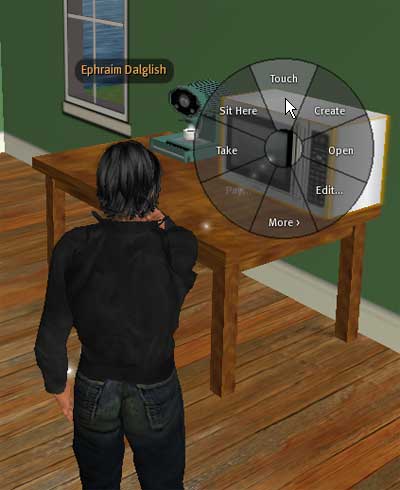
An example is the microwave in the Student Lounge on the second floor of the library at the Printer's Devil.
To activate the microwave, right-click it. A pie menu will appear. Choose "Touch."
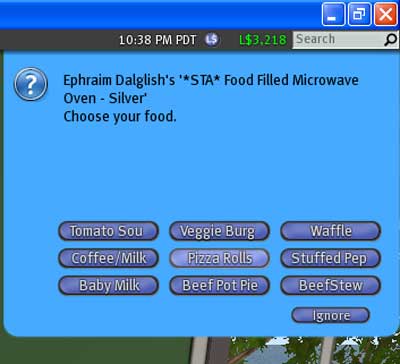 A blue menu will now appear at the top right of your screen, giving you a choice of freshly nuked tasty comestibles!
Choose the item that you would like.
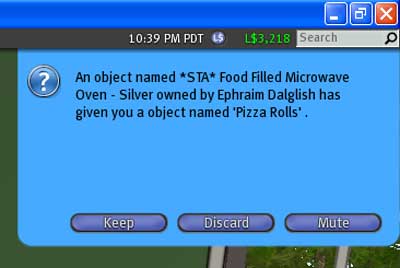 Another blue box will now appear announcing that you have been offered the food choice that you made (in this case, "Pizza Rolls."
Assuming that you have not changed your mind about your choice (a Veggie Burger does sound pretty tempting too, after all), choose the "Keep" button.
This will send a pizza roll to your inventory.
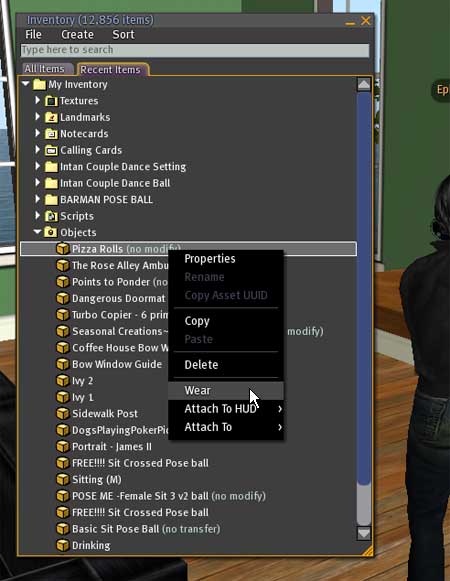 Open your inventory, go to they "Recent Items" tab at the top, and look for your newly arrived pizza roll!
Right click on the item in your inventory, and choose "Wear." (Yes, that's right, wear.) The pizza roll will now appear in your avatar's hand, and an animation will have your avi taking bites out of it periodically.
Yum! Pizza Rolls!
Customizing Your Avatar
You do not need to change your appearance in any way for the purposes of using Second Life for our course work. If you don't mind the look that was given to your avatar when you created it, and are unconcerned that others in the class may share this look (as there are a limited number of initial appearance from which to choose when you start), it is perfectly acceptable to leave your appearance exactly as it is.
On the other hand, you may well wish to customize and individuate your avatar. This also is fine, but you should keep in mind that doing so will require some effort, some time, and (if you want to do a really good job) perhaps even some money.
Customizing your avatar can involve shopping (usually for "freebies," or "free" items), changing clothing and other attachments, and editing your avatar in "Appearance mode.
Wearing Clothing and other Attachments
Putting on and taking off clothing in Second Life is fairly easily accomplished.
Basic clothing for your avatar optionally might include any of the following:
- Undershirt, shirt, and jacket
- Underpants, pants, or skirt
- Socks and Shoes
These items will appear in the "Clothes" folder or your inventory, and are indicated by tiny icons shaped like . . . undershirts, shirts, jackets, underpants, etc., etc., etc.
In addition, some other items, including certain kinds of skirts (called "prim" or "flexi" skirts), accessories (like belts, collars, and the like) and more complicated shoes will take the form of "prim objects" (called "attachments") and will be labelled, but will appear in your inventory alongside a tiny icon of a box (see the picture above). The stand-up collar that is part of the jacket shown below is an "attachment."
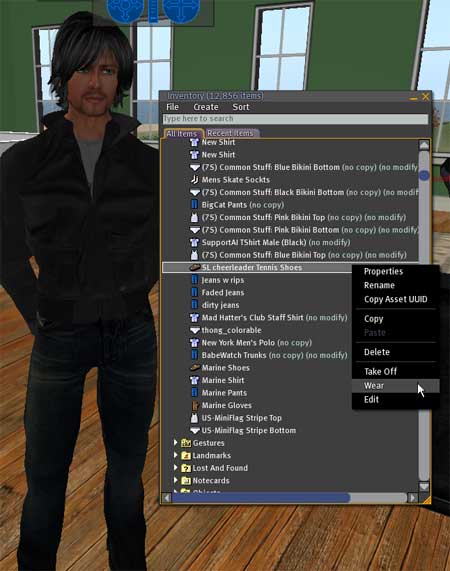 All of these items are worn in the same way. Find the clothing item in your inventory, right-click on it, and choose "Wear."
 Removing clothing can involve one of three different processes, depending on how you choose to go about it.
- Simply wearing another item that replaces one already worn will remove the first item.
- As well, you can go to your inventory, find the item currently worn (which will be highlighted in bold, and appear with (worn) next to it), and, right-clicking it, choose "Take Off." Note that you can find all items worn by searching in your inventory using the word "worn."
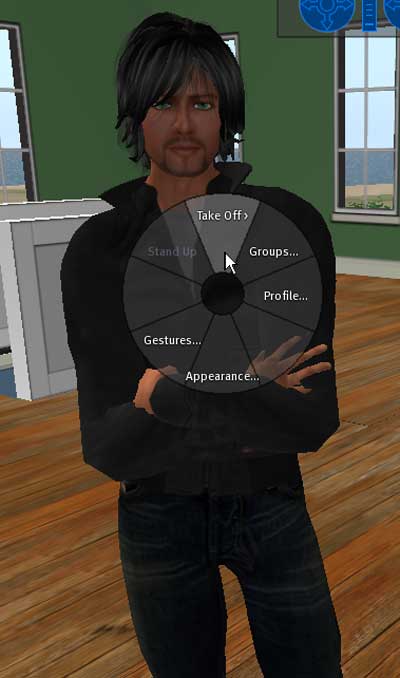
- Finally, you can right click on your avatar, and choose the "Take Off" option that appears in the pie menu.
Clicking on "Take Off" in the pie menu will take you to a second pie menu.
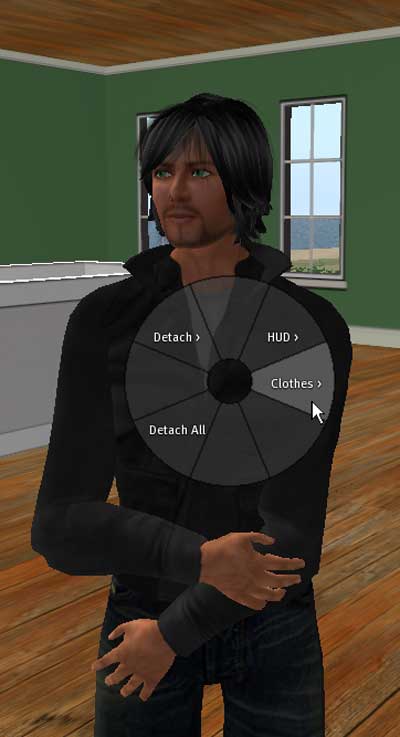 From this pie menu, choose "Clothes." A third pie menu will now appear.
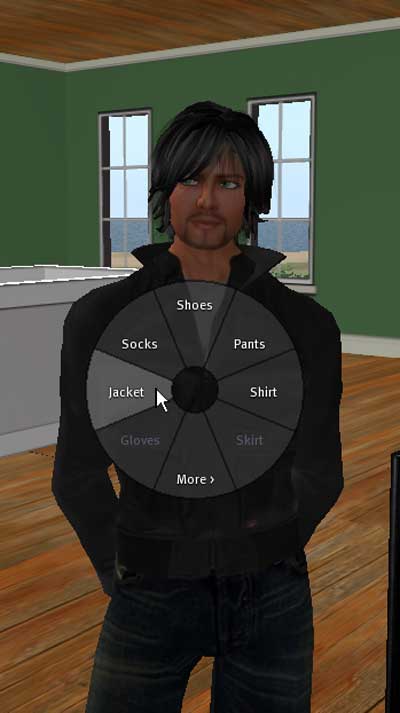 Choose the particular item of clothing you wish to remove, and click it. The item will be removed (and will appear as such in your inventory).
Choosing the "More >" option at the bottom of the menu will display additional clothing choices (as for example underclothes).
You can remove "attachments" in this same way, by choosing "Detach" rather than "Clothes" from the second pie menu. You can also right-click on the attachment, which will prompt another pie menu, and outline the attachment in yellow. Choose "Detach." (Do not choose "Drop," as this will literally drop the item to the ground, leaving it there, rather than returning it to your inventory.)
Your avatar's shape, skin, and (usually) hair are treated in the same manner as clothes: they can essentially be taken on and off in the same manner as clothing, the main difference being that you can only change your shape and skin by replacing them with new ones (i.e., you can't have a shapeless or skinless avatar).
Hair, beards, and other (ahem) miscellaneous body parts are generally attachments like any other; "wearing" them should attach them to your avatar at the appropriate place.
Buying Things
Although you may be given new items by other avatars or objects in Second Life, the most common way to acquire new clothing and so forth is by buying it. Most objects in Second Life cost virtual money, the so-called "Linden Dollar," usually abbreviated "L$". The Linden dollar is a quasi-real currency: it can be both bought using real money, and converted back into real money. The exchange rate fluctuates, as with all currencies, but generally a Canadian dollar will buy you about 230 or so Linden dollars.
Fortunately, however, there are also a great many "freebies" (which you can "buy" for free) or "dollarbies" (which cost L$1) available, so you actually don't need to spend real money in Second Life. (I never have!) Obtaining freebies involves the same process as paying money for items.
I have given, or will be providing you with, an in-world "notecard" (a simple text document) with links to two stores that feature almost exclusively freebies and dollarbies, but there are many, many other sources for free goods throughout SL. Many stores feature freebies exclusively available to new avatars (those under 30 days old); you can find a list of these at:
http://slfreestyle.blogspot.com/2009/08/list-under-30-days-avatar-resources.html
(Note that there are a number of blogs online that advertise or list freebies and in-world sale items; these can usually be found by Googling "freebie" and "Second Life.")
Remember that shopping in Second Life can be a very time consuming and frustrating experience, just as in "real life." It is also, however, a very popular activity, especially "bargain hunting."
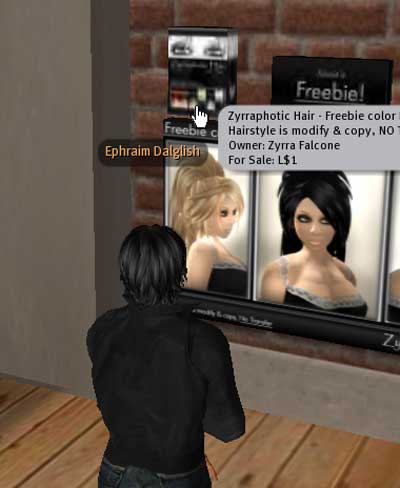 To buy an object on display, click on the item or the display sign or box. Usually, just running your cursor over it will provide details of the object, and its price.
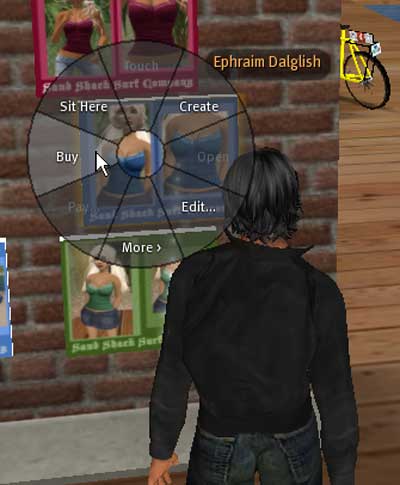 Choose "Buy" from the pie menu that appears when you click on the object or vending sign.
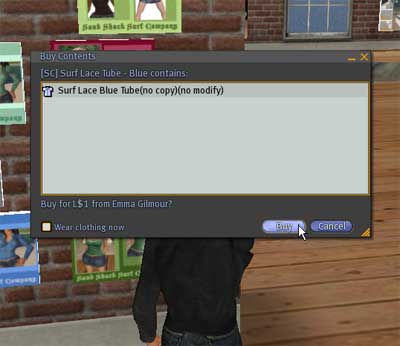 A box will appear with an itemized list of the objects included as part of the item that you are buying, as well as a confirmation of the price. If you are satisfied that you are getting what you want, click the "Buy" button.
(Caveat emptor: if you are spending L$s on items, you will want to take a moment to inspect this box carefully. As well, vendors will sometimes use "Quick Pay" boxes, that do not display the exact items.)
 You will now be prompted with a blue box at the top right of your screen, informing you that you have paid the vendor the agreed amount for the item (even if this is L$0).
A further blue box will usually tell you that the item has been delivered to your inventory.
Opening or Unpacking Boxes
Most items will arrive in your inventory ready to use or wear. However, some items will be "boxed," and must first be unpacked and the contents loaded into your inventory.
A first requirement of unpacking a box is a place that will allow you to do this. Most sims in Second Life will NOT permit you to pull things out of your inventory (or "rez" them, as it is called). The most common place to do this is in a so-called "sandbox," a free area provided (at least ostensibly) for building, but also used to rez and unpack items. You can find a sandbox by searching that term in-world, or you can use a small one thoughtfully provided by FIMS' Teachergirl Razor on ITRC at Western Island, at this SLURL:
http://slurl.com/secondlife/ITRC%20at%20Western/86/68/31
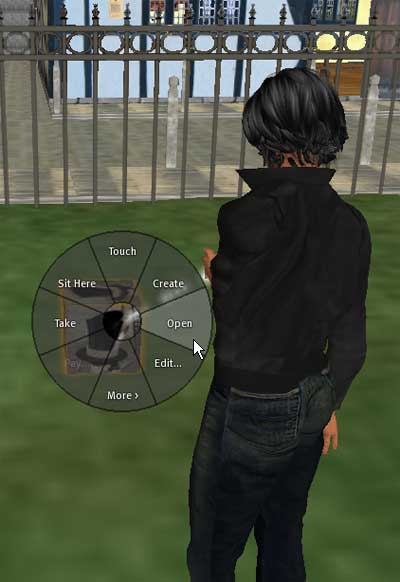 To unpack a box, drag and drop it from your inventory onto the ground. Then, right-click it, choosing "Open" from the pie menu that appears.
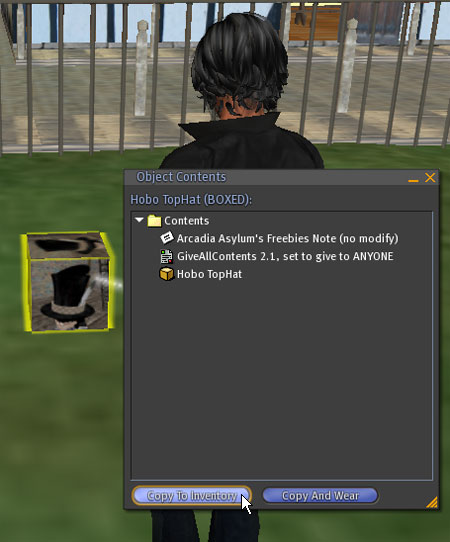 At this point, a pop-up box will appear detailing the contents of the box. Choose the "Copy to Inventory" button that appears at the bottom left of that box, and the contents will be transferred or copied into your inventory, ready to use.
If one or more of the items in the box are "No copy" (meaning that the creator has prohibited you from making copies of the object), you will be prompted with a warning to this effect. As the item is going into your inventory, you can ignore this, and simply click "Ok."
Changing Your Appearance
There are a number of ways of changing your appearance, including the use of new shapes, skins, hair, and clothing, but the most obvious of these is to edit your actual avatar. (Note however that many shapes, skin, hair, and items of clothing are set to "No Modify," meaning that they cannot be changed or edited.)
WARNING: Be aware that an unpracticed hand at this may find it exceedingly difficult to produce a satisfactory result. Try this only if you are feeling particularly daring or lucky. In particular, however, DO NOT TRY TO EDIT YOUR HAIR USING THIS METHOD. You will be FAR better off buying a new freebie hair style somewhere. (See below.)
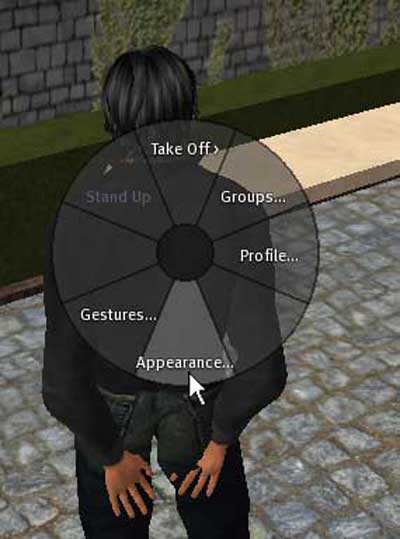 To edit your avatar in "Appearance" mode, right click on it, and choose "Appearance" from the pie menu that appears.
This will put your avatar in "Appearance" mode; it will swing around to face you, assume a rather silly pose, and the "Appearance" box will pop up on your screen, as below.
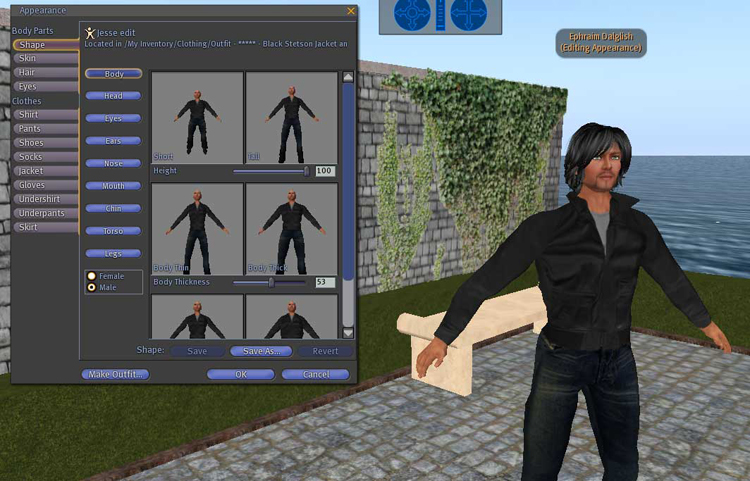
There are over 1000 different parameters that you can change, often quite subtly, using the Appearance edit dialog, so it is possible to spend hours and hours fiddling with them.
It is highly recommended, however, that before you begin the process of editing your appearance you "Save" your current settings and "look," so that if you DO make mistakes, they are not irremediable.
To save your current "look," including all settings for your body as well as your current outfit, click the "Make Outfit" button at the bottom right of the "Appearance" dialog box.
.jpg) A new box will appear. In the text field where it says "New Outfit," type an easily remember name for your current look.
A new box will appear. In the text field where it says "New Outfit," type an easily remember name for your current look.
By default, this feature only saves basic clothing items. Make sure that all of the boxes under "Items to include in outfit" are checked, to save your shape, skin, hair, and eyes as well as your clothing.
When you click "Save," a new folder will appear in your inventory in the "Clothes" folder. This folder will contain ALL of the items that you are currently wearing (if you checked them). Reverting to this look again is easy: you can drag and drop the entire folder onto your avatar, and he or she will automatically "wear" all of the items contained within, including your (original, unedited) shape and skin.
A quick note on hair: Of all the features of your avatar, hair can most easily and quickly change your appearance. Hair comes in one of three varieties:
- "Slider" Hair -- Slider hair is created using the Appearance edit dialog, as shown above. In general, slider hair is almost always ugly looking. It is highly recommended that you do not change your appearance this way.
- "Prim" Hair -- Prim hair is a sculpted object that you wear on your head. The hair you are initially provided with when you first create you avatar will almost certainly be prim hair. Its quality can range from the "meh" to the very very good (and often quite expensive).
- "Flexi" Hair -- Flexi hair is a variety of prim hair that uses special flexible parts to simulate the look of your avatar's hair swaying or blowing as he or she moves. Again, the quality of this kind of hair varies.
It is not at all hard to find freebie prim or flexi hair. Almost anything you can find will look better than hair created using the sliders in your "Appearance" box. Unless you are already a master at manipulating these sliders, leave your hair alone until you find replacement prim or flexi hair to replace that with which you started.