Gel documentation
You will be doing this a number of times in the course.
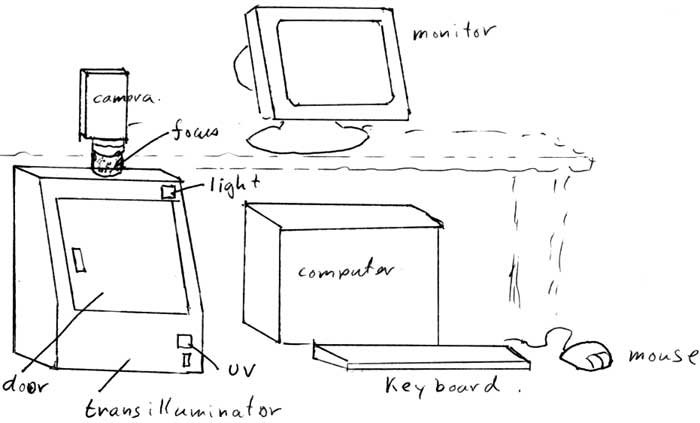
This is best done with two people: one person operates the transilluminator and camera, and the other person operates the computer.
1.) On the monitor should be a live image of what the camera is seeing. If not a live image, use the mouse to click on the live image button. If there is no image check with the TA.
2.) Open the door of the transilluminator. Gently pick up the gel from the Ethidium bromide bath rinse it in the rinse bath. Place the gel on the transilluminator. YOU MUST BE WEARING GLOVES WHEN YOU ARE HANDLING THE GEL!!
3.) Turn on light source in the box. The switch is on the upper right hand side. Move the gel to the center of the field of view. Using to zoom ring on the camera located just above the focusing ring have the gel fill the field of view if it does not already do so. Focus the image using the focusing ring at the bottom of the camera.
4.) Turn OFF the light source and close the door. YOU DO NOT WANT TO BE EXPOSED TO THE UV LIGHT. Turn ON the UV light source using the switch found on the bottom right.
5.) Look and see if you have an image. If you have a strong image on the live camera then you may save the image. If the image is weak then you will need to integrate. To integrate click on the integrate button using the mouse, and select an integration time that improves the brightness of the image. If the signal is still weak select a longer integration time. When you have a good image; you can save the image.
5.) To save the image you need to click on the file menu button and select save. The default folder the image will save to is the group folder. You want to open your group folder and save the image in that folder. Give the image a name: XXX.img, and remember to record the name in your lab books for future reference. Click on the OK button. This will save the file as a .img file which can only be opened by the molecular analysis program. Therefore, to get an image that you can open on your computer you need to save the image as a tif file. To do this go to the file menu button and click on "save as". There will appear a number of options, pick .tif raw data and save the image.
6.) Close the saved image (s) and return the molecular analysis program to live image mode.
7.) Turn OFF the UV source and remove the gel from the transilluminator. Throw the gel into the Ethidium bromide waste. Use a paper towel to wipe down the surface of the transilluminator and throw the towel into the Ethidium bromide waste.