Writing CSS
In this lesson we'll mark up our semantic HTML page so that it has some more styling in it.First, a bit of HTML
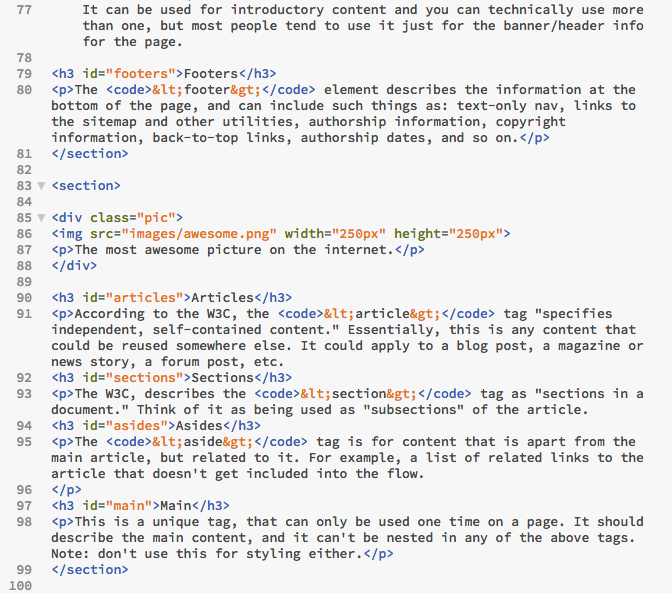
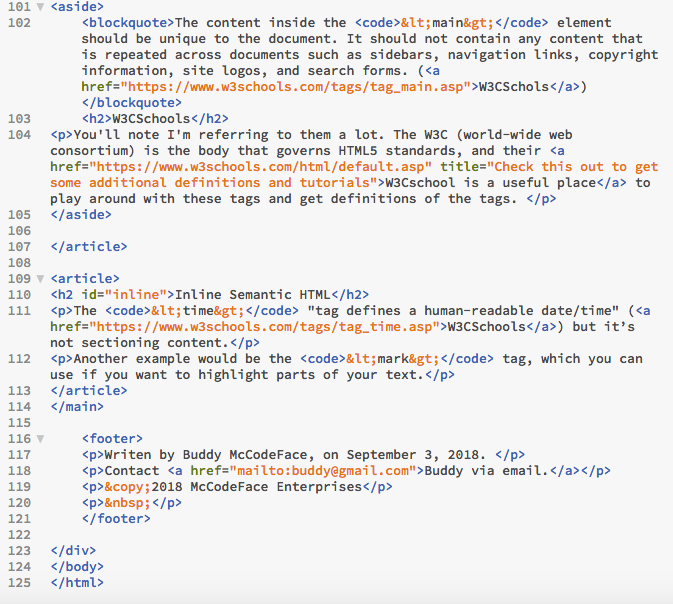
The first thing we're going to do is add a <div> tag to the HTML so that we can center the document on the screen and give it a width.
Within the <body></body> tag, you'll need to add one more tag and an attribute. This goes right after the opening <body> tag:
<div id="box">
And this goes right before the closing </body> tag:
</div>
Now let's add some styles
A good rule of thumb to follow when you're starting is to think about:
- your default values, such as the body text, background color, etc.
- how you are going to handle the screen resolution problem.
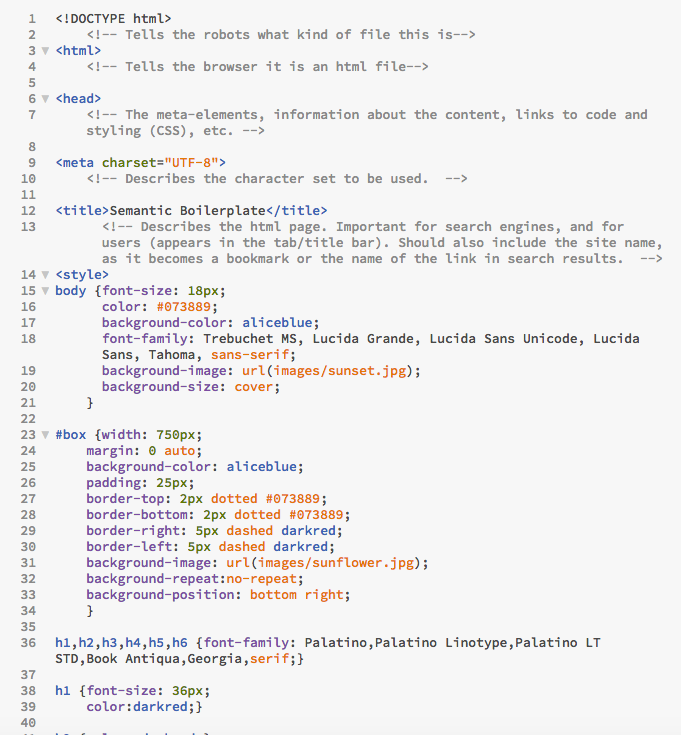
We'll start by tackling the first problem. Let's think about what we want to do for our default values for the page. If we don't do anything, then the default values will be determined by whatever our audience member's browser is set to do. That's no good. We should have some idea of what we want. We'll do that by creating a body selector. We write this in the <style></style> tag, which is in the head of the document:
body { }
Inside the curly brackets we'll add the default values we want for the whole HTML page. So, we can set the default font. Let's say we want to use a system font most people have on their computers, say Trebuchet:
body {font-family: Trebuchet MS, Lucida Grande, Lucida Sans Unicode,

		Lucida Sans, Tahoma, sans-serif;}
This is called a font stack. It essentially means that the browser will try all of these fonts until it finds one on the system.
Next we'll include the font size and color:
body {

        font-family: Trebuchet MS, Lucida Grande, Lucida Sans Unicode,

Lucida Sans, Tahoma, sans-serif;

font-size: 16px;

color: #444;

}
#444 is a hexadecimal value for color, and it is a dark gray. Normally hex colors are six characters long, but when they are made up of double values, they can be shortened. So white, for example, is: #ffffff, but it can be shortened to #fff. Red is #ff0000, so it could be written as #f00.
Let's add one more value to the body. Let's make the background color different from the default (browser) value, which is white. Let's make it light gray, which is #ccc.
body {

          font-family: Trebuchet MS, Lucida Grande, Lucida Sans Unicode,

          Lucida Sans, Tahoma, sans-serif;

          font-size: 16px;

          color: #444;

          background-color: #ccc;

          }
Centering the box and reducing the width
Now that we have some default styles for the page, let's add some more visual flare by giving that main div some style. We've already decided to call it an ID with the name "box." In the styles, let's add:
#box {width: 700px; padding: 25px; margin: 0 auto;}
This will give the whole div tag a width of 700px, some padding inside of 25px, and it will center the margins (that is what the "auto" does -- it forces the browser to look at the remaining number of pixels left on the screen, and puts the same amount of them on both the right and left side.)
Yay!
Okay, how about a different background color for the #box? Inside the curly brackets of the #box ID, add:
background-color: #fff;
Creating tag selectors
Let's create some selectors for our h1, h2, and h3 tags.
Again, we will do this in the <style> tags. For the font, I'm going to add another style of typeface. Our body text is sans serif, so I'll choose a serif font. Palatino is widely available. We can set the font for all of the header tags in one declaration, by lumping them together with commas:
h1,h2,h3,h4,h5,h6 {font-family: Palatino,Palatino Linotype,

	      Palatino LT STD,Book Antiqua,Georgia,serif; }
You'll note that I didn't add the font size or color -- that's because I may want to have different colors or sizes for the different tags. How about we just do a couple?
h1 {font-size: 3ems; color: #003; }
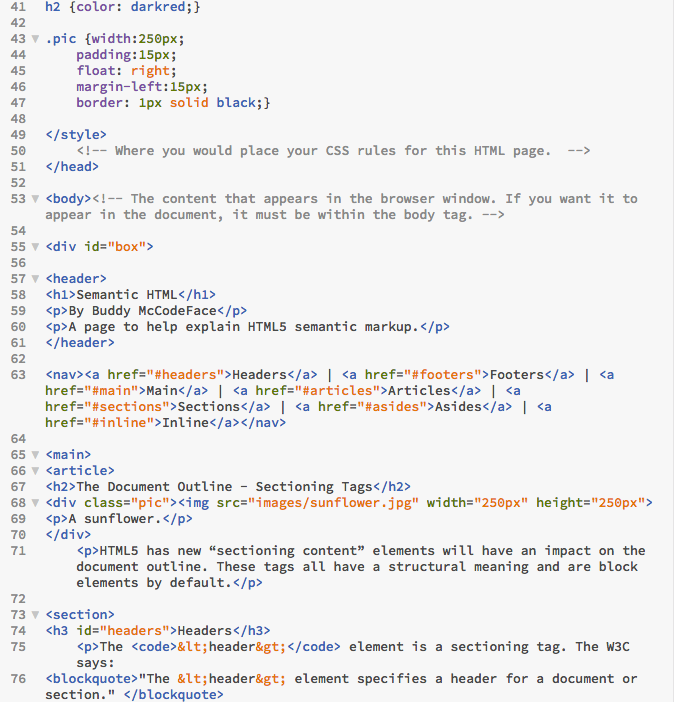
h2 {font-size: 2ems; color: #039;}
Let's try a class next
Let's say we want to be able to do a pullquote for one of our paragraphs. This is a perfect time to create a class, as it is the kind of style we might want to apply to a number of elements.
First of all, let's write the class. We will make it a slightly smaller font, with a different color, background color, and we'll add another property: a border.
.pullquote { font-size: 12px; color: #fff;

        background-color: #9CF; border: 1px solid #003;}
I've given you the shorthand for border properties here. You will want to check out all the properties and values for borders at the W3CSchool. For example, instead of making the border solid all the way around, you could choose to make it solid on three sides, and dotted on one. Then you have to show the rest of the border properties in different declarations. I'll put them on separate lines so they're easier to see:
.pullquote { font-size: 12px; color: #fff;

background-color: #9CF;

border-style: solid dotted solid solid;

border-width: 1px;

border-color: #003;}
So now we have the style, but we still need to apply it. To do so, find the element in your design that you'd like to change. Let's do one of the paragraphs. It will look like this in the code:
<p class="pullquote">
You only need to add the class="pullquote" to the opening tag. Note that there's no dot in front of the word. That's because in HTML, the attribute "class" tells the browser to look for the class called .pullquote in the CSS styles. (So that's why it's important to ensure you've got the correct punctuation in your CSS.)
Background images
You can also add background images to your whole document. That is done with another property and value.
background-image: url("image.jpg");
Let's download this image into our images folder and add that property to the page. Sunset pic by Alex Derr via Flickr.
Now we just add that to our body style:
body {

        font-family: font-family: Gill Sans,Gill Sans MT,

          Calibri,sans-serif; font-size: 16px; color: #444;

        background-color: #ccc;

        background-image: url("images/sunset.jpg");}
Well done. Let's try one more image. We'll add this to the background of our #box ID.
#box {width: 700px; padding: 25px; margin: 0 auto;

          background-color: #fff;

          background-image: url("images/sunflower.jpg");
}
When we look at it, it fills the whole box. But with CSS you can control where there image appears, and how. (W3Cschools tutorial here.)
Let's make it so the image is more like a watermark, so it doesn't repeat, and it just appears once at the top right of the box:
#box {width: 700px; padding: 25px; margin: 0 auto;

background-color: #fff;

background-image: url("images/sunflower.jpg");


background-repeat: no-repeat;

background-position: right top; }
Like the border, this declaration can also be shortened. For practice, go to the W3C page, and look up how to do that!
Remember to save and check on a browser
While you're working, it's critical to ensure that the code is working the way you intend it. Brackets is good at showing you when something is wrong, but I find it's easier to actually see the design as you go.
To do so, save frequently and check in a browser. That's really easy to do:
- Go to the file menu
- Click on open file
- Navigate to the page you want to check
I keep the tab open, and when I'm designing, all I have to do is save the HTML and CSS files, and I can simply hit the refresh or reload button to see the changes. Simple.
Note: if you're using Chrome on a PC, the File Menu may be hidden. Use CTRL+O to open up the browse menu. [CMND + O on a Mac]
Okay, now you're ready to tackle exercise 2.
We'll use the same page we updated in the Writing Semantic HTML lesson. If you don't have it handy, you can get the sample HTML here.
We'll also need a couple of images: sunset image | sunflower. (Right-click or CTRL-click and "Save Link As". This will let you save the image directly into your images folder.)
And finally, remember to save and preview your design often.
Screenshots of the lesson (click to see full size)


