Creating Your First Page
Activating your publish space
Western provides us with personal space on their "publish" web servers. You have to fill out an online form using your UWO username and password to activate your webspace. We'll do this first, so that we can make our page "live" at the end of the tutorial.
Create a folder for your website
Use the finder to create a folder for your website. Let's call it "yourname_exercises" (and use your own name to replace "yourname". Open up that folder, and create another folder inside it called "images".
Download a "starter" page
Rather than start from scratch, we'll download this HTML5 boilerplate.
To download the page, open the page, and right-click (ctrl-click) on the page. In the dropdown, click on "save as" (Chrome) or "save page as" (Safari).
Navigate to the "yourname_exercises" folder and click on it. Save it as "index.html" in your "yourname_exercises" folder.
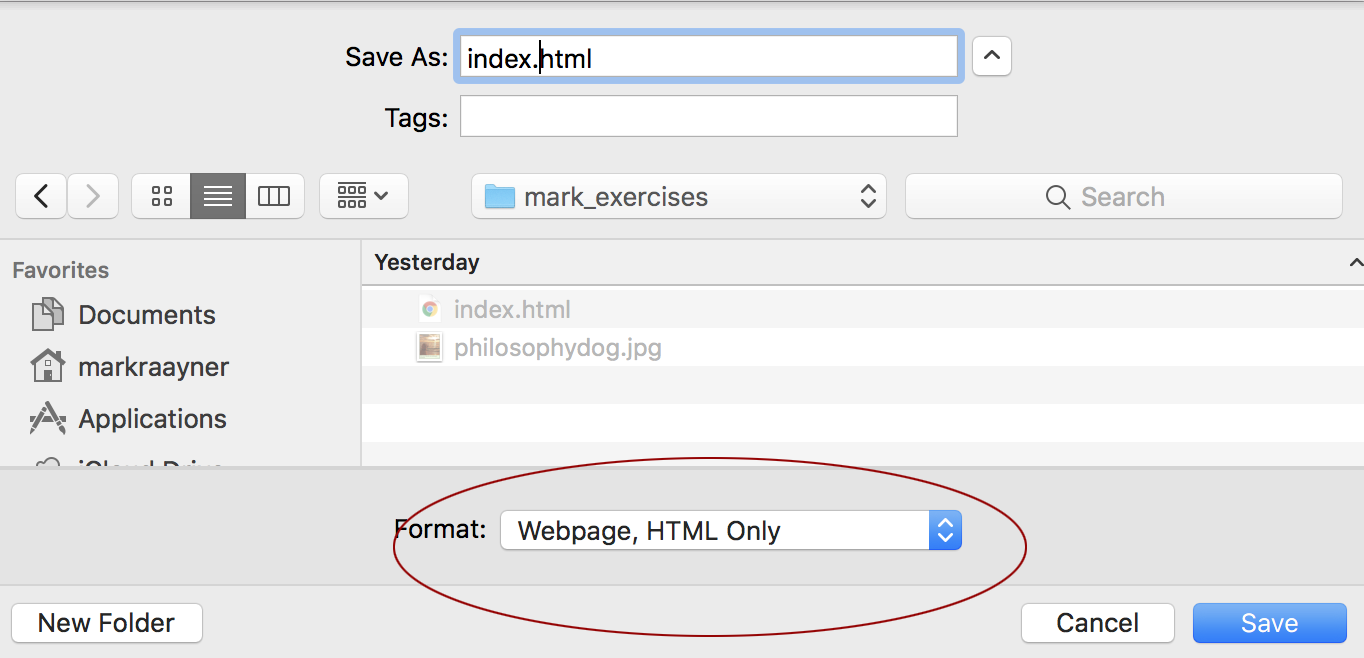
When you do, it's important to ensure you save as an html file, not as an archive. In Chrome change the pulldown, to Webpage, HTML only, like this:

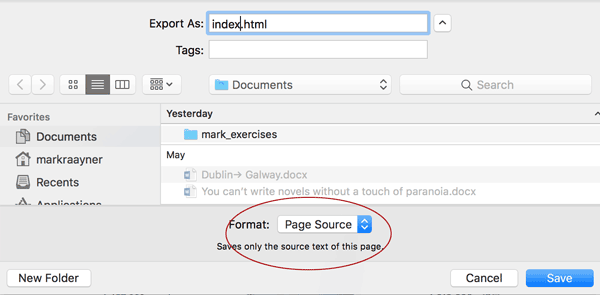
In Safari, you'll see it here, as Page Source:

Next, download the most awesome picture on the internet (below), and save it in your "images" folder

Let's mark this up!
Follow along with the tutorial in class. We'll use Brackets to code this directly.
Tags we'll use:
- Headings
- Paragraphs
- Breaks
- Links
- Images
- Lists
We'll also look at a few attributes that go with the tags.
Let's publish it!
We'll use an FTP client to upload the website to the Western server. Think of the server as another computer that we need to save the files to, in order to get them on the web. We use the FTP client to "save" the file to this server.
Server settings
- Server Name: Publish Server
- Address: sftp.uwo.ca
- Port: 22
- Username: your Western email prefix
- Password: your Western email password
- Site Root: /public_html
Check it online
Your new page will be located at http://publish.uwo.ca/~username
Normally, I'll include the download files here, but they are in the flow of the main article on this page.
If you want to review some of the key concepts, the lesson page that goes with this tutorial is called Writing HTML.
We'll also go over some of the rules about naming files and folders.
Finally, I want to turn you on to a great resource: W3C Schools -- here's the HTML pages.
