
Setting up your final project
Rather than build everything inside your exercises website, I would like to suggest that you build a new root folder for the project. That means you'll need a new folder on your local computer, and a new folder on the server.Start with the server
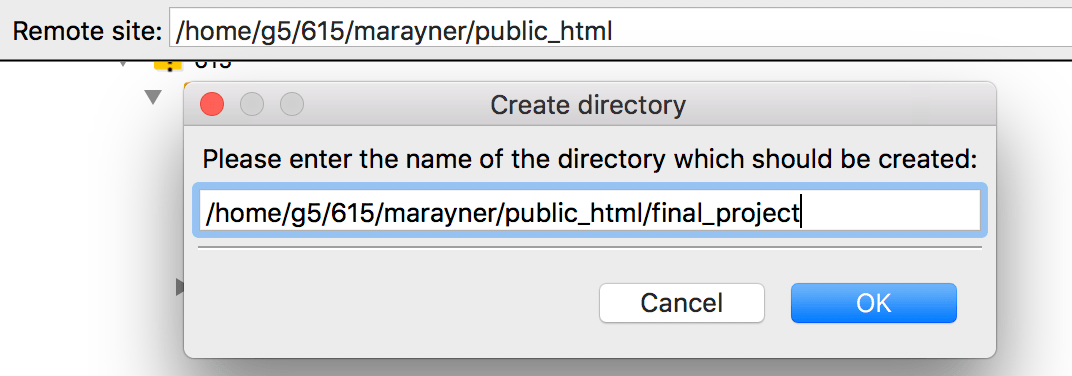
Open up Filezilla and connect to the server. Once you're there, right-click on the public_html folder and create a new folder inside it. (For the purposes of this demonstration, I'll call it final_project.)
When you do that, it will look something like this. Double-check that the new folder is in the public_html folder.
Then make sure you have a new folder of the same name, that you've got on your local computer. (Either on a memory stick or on the hard drive.)
If you're planning to build everything in Brackets and simply use Filezilla to publish then there's no other steps to take. (Just remember that when you're publishing, your project files have to go into the final_project folder on the server.)
A few suggestions for speeding up your build in Brackets
Building your whole site in Brackets means that you'll have to change the navigation on each and every single page. That means a lot of work if you have to start from stratch each time.
Instead, I would suggest you build yourself a series of templates that work for your file structure.
Let's say you have a standard file structure, like this:
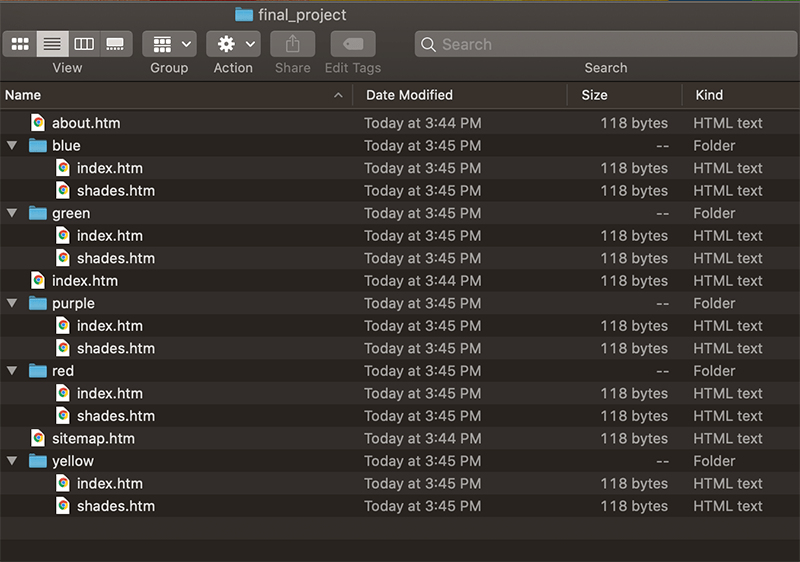
This is a standard approach. There's an index.htm, about.htm and sitemap.htm in the final_project folder, as well as the subfolders. Each of those has just two pages in it in this example. (Obviously, all of this will be individualized for yourself.)
In this case, I would build at least two template files based on this file structure. NB: This could be complicated by how many different layouts you want to produce in your designs. I'm working on the idea that I have one standard layout.
Where this gets time-consuming
The links from one page to another. They will be dependent on their relative file structure. My goal here is to speed up the process as much as possible.
My first template
This would be used on the files in the top level of the file structure, ie, the three pages in the final_project folder. In these pages, the links to the persistent nav (yellow, red, blue, green, purple) would all have the same structure, for example:
<a href="yellow/index.htm">Yellow</a>
(Look down for the yellow folder, and once you're there, open up the index page.)
The links to the utilities and to the home page would also all be the same:
<a href="index.htm">Home</a>
(Look in the same folder, and show the index page.)
My second template
For the secondary-level pages -- all the pages in the sub-folders. I would start with linking all the persistent nav like this:
<a href="../yellow/index.htm">Yellow</a>
(This means: look up one level, and then show the folder yellow, and open the page called index.)
All the links would look the same in the red, purple, green and blue folders. In this case, they would only be different within the yellow folder. Inside that folder, they would just be the names of the files.
<a href="index.htm">Yellow</a>
So, if you start with all the persistent nav links linking up and then down, YOU ONLY HAVE TO ALTER THE LINKS on the folder you're working within.
That would be the fastest way to build the linkages between each page.
A process to work by
Plan out your file structure meticulously, BEFORE you start building. If you know what you're going to call each file, that will save you a lot of time.
- Design your layout -- call this file layout.htm, and save it in your root folder
- Link the navigation (persistent nav, utilities, home, footer nav)
- Once linked, save this file as "top-level-pages.htm"
- Open up the layout.htm file
- Re-link the navigation as though you are linking from within a secondary folder. (So, all of your links will need to have a ../ in front of them.)
- Save this as "second-level-pages.htm".
Using each template
- Open up the appropriate template file
- Save AS the correct filename.
- Make necessary changes to any links. (NB: you should only need to change the links of the section you are working on.)
Other timesavers and wrinkles
If you have a lot of pages within a section, you might decide to build a template for each section, so that you can save the effort of linking all of your local navigation. Then the process becomes similar, except after you have built your second-level templates, you'll then SAVE AS for each section, and add your local navigation as you change the link to the landing page of that section. If you've got more than two pages in a section, I'd recommend this in fact.
The real wrinkle comes when you need multiple layouts within a section. That will require more templates.
NB: don't forget to ensure you've got the right link to your style sheet.
Setting up in Dreamweaver
Having read that, you may want to try using Dreamweaver to help with templates, or templates, building and publishing. The tool does excel at helping speed up a build. First you'll need to set up the new site in that program.
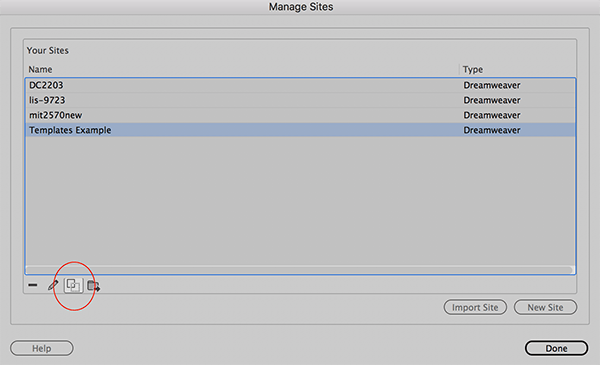
Start by going to the Site..>Manage Site menu.
Highlight your exercises website (I'm using the Templates website for this example) and then click the duplicate site button in the bottom left of the dialog.
This creates a copy of your exercises website, and will save us some time setting up the server. Double-click on the exercises site copy (or click and hit the edit or pencil button).
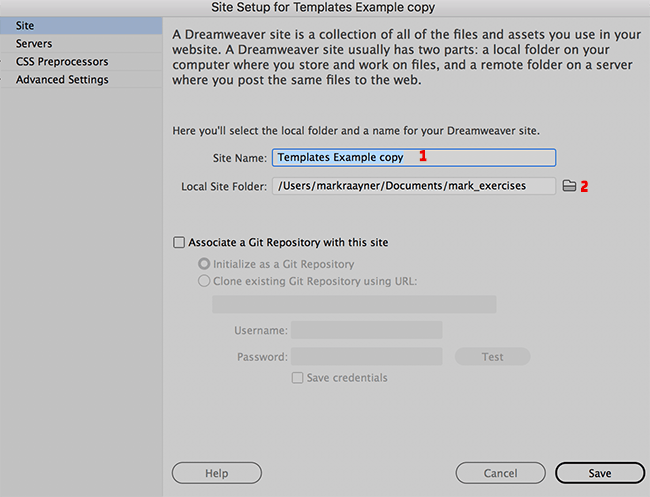
When you get this dialog, change the site name (1), and browse to your new final_project folder (2), on the local drive.
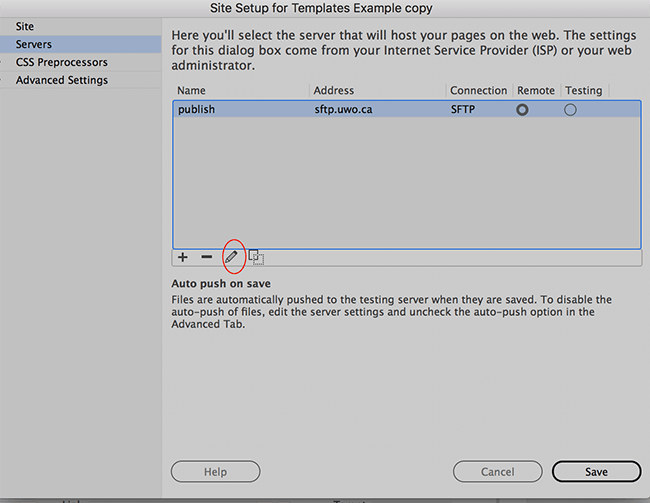
Now go to the left sidebar and click on "Servers" under the word Site.
That brings up this dialog. Double-click on the server name (highlighed in blue) or click on it and then use the pencil icon to edit.
That will bring up this dialog. Make sure everything is still correct, and then add the new server name to the destination or root directory, circled in red.
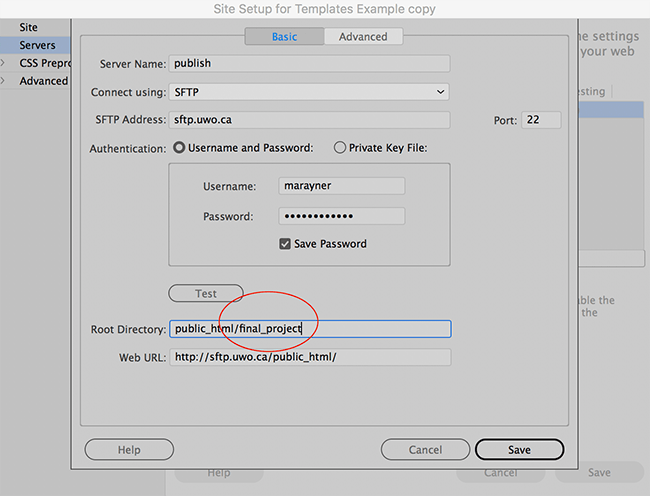
Hit Save..> Save..> Done.
You now have a fresh setup for your final project and if you want to publish using Dreamweaver, all your final project files will go directly into that folder on the server. (This will leave your exercises intact.)
A final note: I hope it's obvious that you can name the folder something other than final_project, but if you do use that name, I'll be able to guess your website's URL, which will be (generically):
publish.uwo.ca/~username/final_project