
Using FTP
FTP stands for File Transfer Protocol. It is the technology we use to put our files on the server so they are visible on the web. It sounds more complicated than it is. Really, FTP is just a special way of saving a copy of our files to another computer.
We are going to use a program called FileZilla to transfer files from our computers to the server. If you're using your own computer, you can download a free version of FileZilla Client here.
Western University offers all of us free space on the publish server. If you haven't already activated your publish service, you can do that here.
File Structure
As we start to play with this, you'll quickly see how important file structure is to the process. You need to be able to ensure you're saving things in the right folders at all times. Essentially, we're going to have two versions of our website. One that is on our computer (or saved on a memory stick) and the other that is saved on the server.
The folder on our computer is called "exercises/".
The folder on the server is called "public_html/exercises/"
Launch FileZilla
Start up Filezilla and have a look at the interface. This program can do much more than what we're going to use it for, so we'll only be using a few of the tools.
Let's connect to the server
Let's start with just a quick and dirty upload of our files, using the "quickconnect" button. Fillout the fields at the top of the screen with the following, using your own Western email prefix for username, and your email password for the password. The Host is: sftp.uwo.ca and the Port is: 22

Once you're connected, you should see the remote server info as well as your local info.
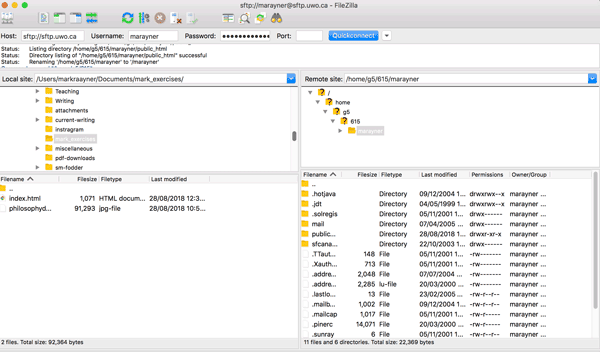
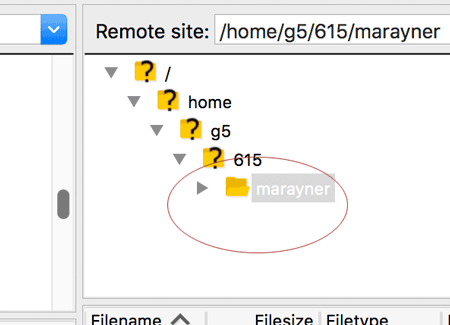
The left side will show your computer information and the right side will show the server info. On the left side, use the "local site" pulldown to change to the "exercises" folder. On the right side, click on the little arrow next to your username, pictured here:
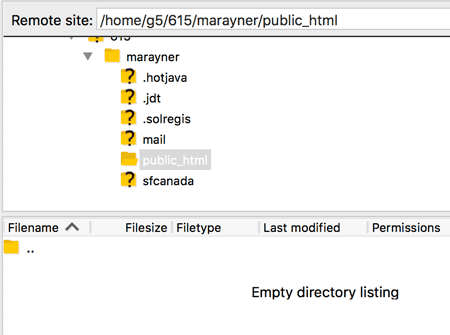
Change that to the public_html folder. It should look like this now:
Publish your files for the first time
- On the left side of the screen (your "local" site, or the version that's on your computer), click once on the "exercises" folder (highlighted in blue).
- Then right-click on the blue highlighted "exercises" folder.
- Double-check the folder that is highlighted on the right is the public_html folder
- Then click on the upload button
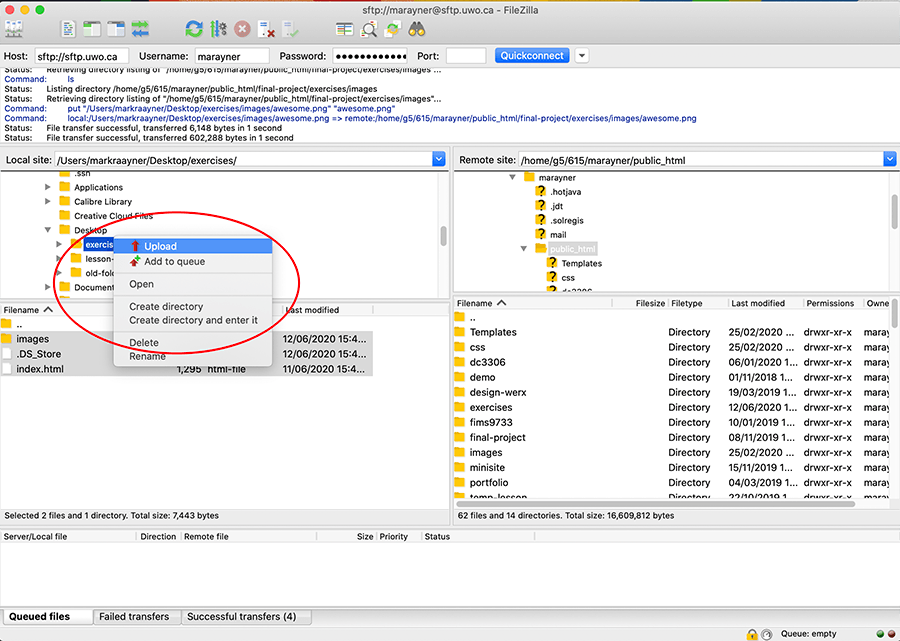
The folder will appear on the right side of the screen, and now you are live on the web!
Remember that changes need to be republished
It's important to remember that if you make changes to the "local" version of your site, eventually they will have to be republished to make them live on the web. My recommendation is to publish at the end of your work time, rather than to continually be republishing files. Remember, you can preview your local version of the site much faster.
- This time, highlight the exercises folder that is inside your public_html folder on the right side of the dialog.
- On the left side, open up the exercises folder and highlight the folders and files you want to send to the server
- Right-click and use the upload button
- This will put them into the exercises folder on the server (which is the public_html folder)

When you republish your files, Filezilla will ask you if you're serious about it in another dialog:
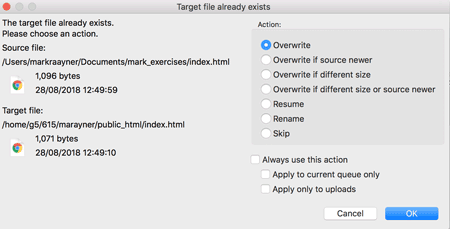
You can say "overwrite" or one of the other options, if you want to be careful about it. Click ok once you're sure. You may also want to click on the checkbox that says "Apply to current queue only" so you don't have to do this with each file.
Where is your site?
Now you should check to make sure everything is working properly. Your site is located at the following URL:
http://publish.uwo.ca/~username/exercises
The "~username" folder actually corresponds to the "public_html" folder on the server, but the server is programmed ot show the public_html folder automatically when you put in your username in Filezilla.
The "tilda" symbol (~) can be found next to the 1 key. Hit it + shift.
One more trick. You'll notice there's no filename at the end of that URL, so how does your homepage appear? That's because we named it index.html -- this is called a "default" page, and the server knows to show it automatically. Any folder that contains html documents should have an index page as its main page. This is a best practice.
Troubleshooting
If your site doesn't appear, don't panic. Here's the steps to follow:
- Check the spelling -- did you include the tilda? Spell your username correctly?
- Check the index page. It should be called index.html (lowercase letters or it won't work!)
- Check the folder spelling. Is it lowercase?
- Have you refreshed the browser? When you first visit a page, the browser makes a recording of the webpage, and it will show you that recording automatically. (This is called the "cache".) So if you've just uploaded a new version of the page, you'll have to reload the page -- do this by hitting the reload button, or CMND (CTRL) + R. Hitting the return key won't work!
- Are you getting a 403 permission error? This means your permissions have somehow changed. Follow the steps below to fix this problem. (This shouldn't happen very often, but it does on occasion, still.)
Fixing Permissions
The publish server is a secure environment, and sometimes the permissions get changed. If they do, there are a couple of things to check. Folders should be set to "755" and files to "644".
First check the public_html folder to ensure it has the correct permissions. Go to the right side of the screen and right-click on the public_html folder:
Then click. In the next dialog box, replace the number with "755". If it already says that, you can just hit cancel.
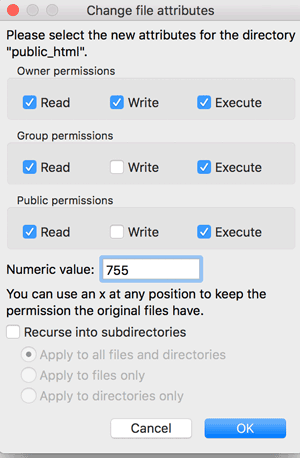
If you want to do a global fix from here, just click on the "Recurse into subdirectories" checkbox and "Apply to all files and directories"
Or you can check the files next.
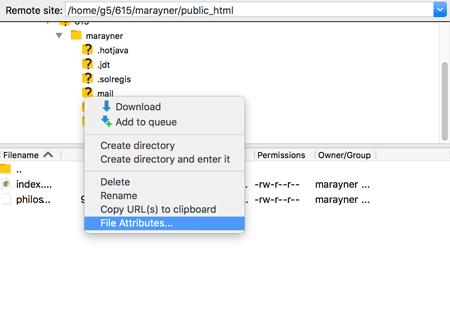
Go down into the folder, and highlight the files, then right-click (Ctrl-click):

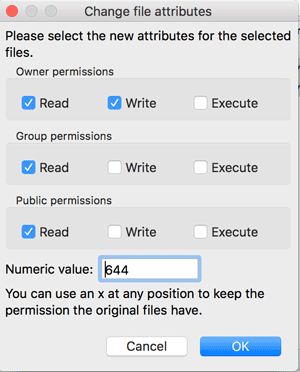
Go to File Permissions and click. Change these to "644":
Then go back to the browser and reload the pages. You should be able to see them now.
When you're finished
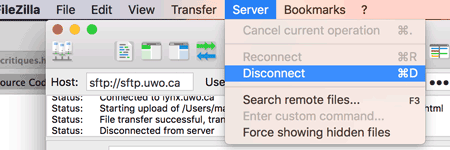
Remember to disconnect from the server. You can do that by going to the Server menu and choosing "Disconnect" or you can hit CMND (CTRL) +D.
In this lesson:
Publish Server Settings
Host: sftp.uwo.ca
Username: your UWO email prefix
Password: your UWO email password
Host: 22
Root folder: public_html